
How to Take a Passport Photo at Home: 2026 Guide
Learn how to take a compliant passport photo at home with your smartphone. Step-by-step guide covering lighting, background, camera settings, posing tips, and AI verification.
Last verified against U.S. Department of State guidance: September 28, 2026
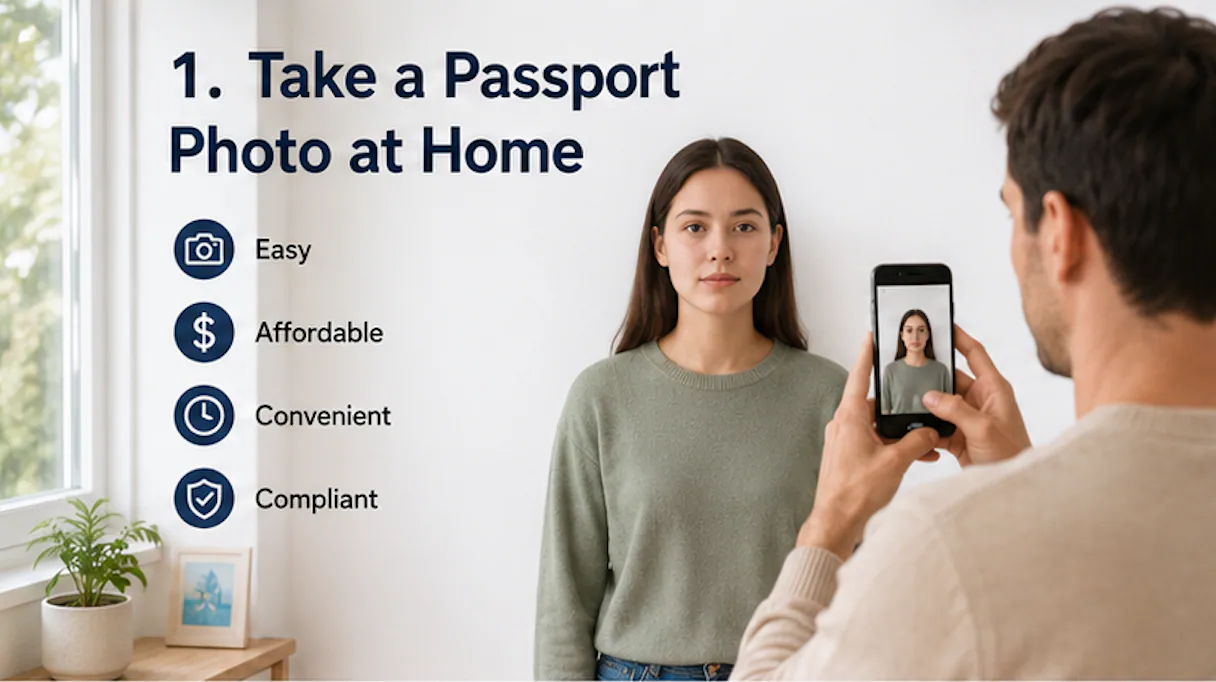
Taking a passport photo at home has never been easier. With today's smartphones, natural daylight, and AI-powered passport photo tools, you no longer need to visit a professional photo studio just to obtain a compliant passport photo.
In fact, the camera inside your smartphone is likely far more powerful than the cameras used by many photo studios just a decade ago. Modern devices combine high-resolution image sensors with computational photography, allowing them to capture sharp, detailed images suitable for official identity documents.
However, owning a good camera doesn't automatically guarantee an acceptable passport photo. Most rejected passport photos aren't caused by poor camera quality—they're caused by avoidable mistakes such as uneven proper lighting setup, incorrect framing, unsuitable backgrounds, or AI beauty enhancements that alter facial features.
The good news is that these mistakes are easy to avoid once you understand the official requirements.
This guide explains exactly how to take a passport photo at home, including camera setup, lighting, background selection, smartphone settings, posing tips, common mistakes, and how AI can help you verify your photo before you submit your application.
Ready to prepare the file? The PhotoOmni U.S. passport photo tool checks the crop, background, head position and output format, then provides a digital photo and print-ready sheet.
Quick Answer: Can You Take a Passport Photo at Home?
Yes.
Many passport authorities allow applicants to take their own passport photos, provided the final image meets all official requirements for:
- Background
- Lighting
- Facial positioning
- Image quality
- Head size
- Dimensions
- File format
With the right setup, you can usually take a compliant passport photo in 10–15 minutes without visiting a photo studio.
Quick Setup Checklist
| Requirement | Recommendation |
|---|---|
| Camera | Smartphone or camera with 8 MP or higher |
| Background | Plain white or off-white wall |
| Wall Distance | About 50–100 cm (20–40 in) |
| Camera Distance | Approximately 1.2–1.5 m (4–5 ft) |
| Lighting | Soft natural daylight |
| Expression | Neutral, mouth closed |
| Camera Lens | Standard 1× rear camera |
| AI Check | Recommended before printing or uploading |
Data Insight
Most modern smartphones now feature cameras ranging from 12 MP to 48 MP, while many flagship Android devices use 50 MP–200 MP sensors. Camera resolution is rarely the limiting factor for passport photos; compliance with official requirements is much more important.
Why More People Are Taking Passport Photos at Home
Home passport photography has become increasingly popular because smartphone cameras, AI image processing, and online passport application systems have improved dramatically over the past decade.
Rather than booking a studio appointment, many applicants now complete the entire process from home using only a smartphone and an online passport photo tool.
The advantages include:
- Lower cost
- Greater convenience
- Unlimited retakes
- Immediate preview
- Easy digital submission
- AI compliance checking
Perhaps most importantly, taking your own passport photo gives you time to carefully review the image before submitting it.
Professional photographers usually have only a few minutes to capture your photo, while taking it yourself allows you to experiment with lighting, posture, and framing until everything looks correct.
What You'll Need
Fortunately, the equipment requirements are surprisingly simple.
1. A Modern Smartphone or Camera
Almost any smartphone released within the last several years is capable of producing a passport-quality image.
Instead of worrying about megapixels, focus on obtaining:
- Sharp focus
- Accurate colors
- Even lighting
- Correct positioning
Did You Know?
Apple's latest iPhone Pro models include a 48 MP main camera, while Samsung's Galaxy Ultra series offers sensors up to 200 MP. Both capture significantly more detail than required for passport photo applications.
2. A Plain White or Light-Colored Background
Your background should be:
- Plain white
- Off-white
- Evenly lit
- Free from patterns
- Free from furniture
- Free from decorations
Avoid textured walls, wallpaper, curtains, windows, or outdoor scenery.
Standing approximately 50–100 cm (20–40 inches) away from the wall helps reduce shadows while keeping the background clean.
Expert Tip
The further you stand from the wall (within reason), the less noticeable background shadows become.
3. Natural Daylight
Lighting has a much greater impact on passport photo acceptance than camera quality.
The easiest setup is standing directly in front of a large window with indirect daylight illuminating your face.
Avoid:
- Direct sunlight
- Ceiling lights only
- Flash
- Mixed indoor and outdoor lighting
Data Insight
Photographers generally consider 10:00 a.m. to 2:00 p.m. one of the easiest periods for obtaining balanced natural daylight, especially on bright but slightly overcast days.
4. A Tripod or Another Person
Although modern phones include excellent selfie cameras, they're usually not recommended for passport photos.
The front camera often uses a wider lens, increasing perspective distortion and making it difficult to maintain the correct shooting distance.
Instead:
- Use the rear camera
- Place the phone on a tripod
- Or ask another person to take the photo
Step 1: Choose the Right Location
Your location determines both the background quality and the lighting.
An ideal setup includes:
- A plain white wall
- A nearby window
- Enough space for the camera
- Even natural light
Avoid standing directly against the wall.
Instead, leave approximately 50–100 cm (20–40 inches) between yourself and the background.
This reduces visible shadows while helping separate your body from the wall.
Step 2: Set Up the Lighting
Lighting is responsible for many passport photo rejection reasonss.
The goal is simple:
Your face should be evenly illuminated from forehead to chin without harsh shadows.
Best Lighting Setup
Position yourself so the window is in front of you, not behind you. Backlighting makes your face appear too dark and often causes automatic exposure problems.
Avoid These Lighting Mistakes
- Flash
- Direct sunlight
- Ceiling lights only
- Mixed lighting
- Strong side lighting
Did You Know?
Passport authorities evaluate whether important facial landmarks—including the eyes, nose, and jawline—remain clearly visible. Uneven lighting can reduce the visibility of these features even if the image itself is sharp.
Step 3: Set Up Your Smartphone Camera
Modern smartphones include many AI-powered photography features designed for portraits.
Unfortunately, these features are usually the opposite of what's needed for passport photos.
Your goal is accuracy—not artistic enhancement.
If You're Using an iPhone
Apple's recent iPhone models produce excellent passport photos when configured correctly.
Recommended Settings
✔ Use the rear camera
✔ Select the 1× lens
✔ Hold the phone vertically
✔ Position the camera approximately 1.2–1.5 m (4–5 ft) away
✔ Clean the camera lens
Turn Off
✘ Portrait Mode
✘ Filters
✘ Third-party beauty camera apps
✘ Digital Zoom
✘ Ultra-Wide (0.5×) Lens
Why?
Apple explains that Portrait mode uses computational photography to simulate shallow depth of field. While this creates attractive portraits, it can produce inaccurate edge detection around hair and shoulders—details that should remain clearly visible in passport photos.
Data Insight
Beginning with the iPhone 15 series, Apple captures 24 MP photos by default while supporting 48 MP high-resolution images. This provides substantially more detail than required for passport photo applications.
If You're Using an Android Phone
Android phones vary by manufacturer, but many include automatic AI enhancement features.
Before taking your passport photo, disable any setting that changes your appearance.
Recommended Settings
✔ Rear camera
✔ Standard 1× lens
✔ Highest available resolution
✔ Natural window light
Turn Off
✘ Beauty Mode
✘ Face Retouch
✘ Skin Smoothing
✘ Face Slimming
✘ Eye Enlargement
✘ Portrait Blur
✘ AI Enhancement
✘ Digital Zoom
Did You Know?
Samsung's Galaxy Ultra series features a 200 MP main camera, while Google's Pixel Pro models use 50 MP sensors enhanced by computational photography. Although these cameras capture exceptional detail, passport acceptance depends on compliance with official photo requirements—not megapixel count.
Step 4: Pose Correctly
Even with the perfect background and lighting, your passport photo can still be rejected if your facial position doesn't meet biometric requirements.
Passport authorities use facial recognition technology to compare your passport photo with your appearance during identity verification. To make this process reliable, your face should be presented naturally and consistently.
Correct Pose
✔ Face the camera directly
✔ Keep your shoulders square
✔ Hold your head upright
✔ Look straight into the camera lens
✔ Keep your mouth closed
✔ Maintain a neutral expression
✔ Keep both eyes fully open
Avoid turning your head, tilting your chin, or looking slightly away from the camera. Even small changes in facial angle can affect biometric measurements.
Data Insight
Modern facial recognition systems locate facial landmarks—including the eyes, nose, mouth, and jawline—to compare identity documents with live images. Consistent facial positioning improves the accuracy of this matching process.
Step 5: Take Multiple Photos
Rarely is the first photo the best one.
Instead of taking a single picture, capture a series of images while keeping the same position.
Small differences in blinking, posture, lighting, or facial expression can significantly affect the final result.
Aim to take 5–10 photos, then compare them side by side.
Look for:
- Sharp eyes
- Natural skin tones
- Even lighting
- Correct head position
- No stray hair covering the face
- No background shadows
Did You Know?
Professional photographers often capture multiple frames of the same subject before selecting the final image. Taking several passport photos increases the likelihood of finding one that meets all technical requirements without needing another photo session.
Step 6: Review Your Photo Carefully
Many passport photos appear acceptable on a smartphone screen but reveal problems when viewed at full size.
Before uploading your image, inspect it carefully on a computer monitor or tablet whenever possible.
Zoom to 100% and check every detail.
Checklist
✔ Eyes are sharp
✔ Eyebrows fully visible
✔ Hair doesn't cover the face
✔ Skin tone looks natural
✔ No beauty filter
✔ No portrait blur
✔ Background is clean
✔ No shadows
✔ Head centered
✔ Correct crop
Expert Tip
Smartphone displays often increase contrast and saturation automatically, making photos appear sharper than they actually are. Reviewing the original image on a larger display helps identify blur, compression artifacts, or subtle lighting problems before submission.
Step 7: Verify Your Passport Photo with AI
Even after checking your photo manually, small compliance issues can still be difficult to spot.
Modern passport photo tools use artificial intelligence to analyze images before they're submitted, helping identify common problems that may lead to rejection.
These systems don't simply resize your photo—they evaluate whether it complies with official [passport photo requirements](/en/documents).
How PhotoOmni Reviews Your Photo
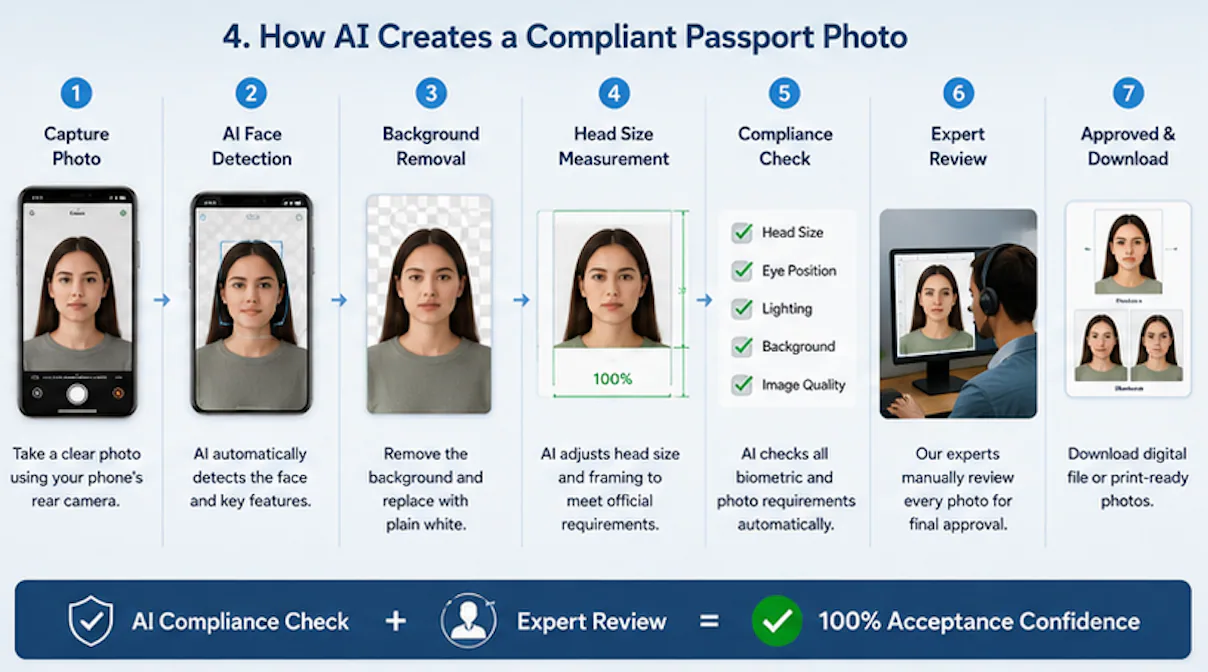
PhotoOmni combines automated image analysis with human quality review to help applicants prepare passport photos that comply with official standards.
PhotoOmni Compliance Workflow
| Stage | Purpose |
|---|---|
| Face Detection | Locate the subject automatically |
| Facial Landmark Analysis | Verify head position and proportions |
| Background Inspection | Detect patterns, shadows, and unwanted objects |
| Lighting Analysis | Identify uneven illumination or glare |
| Blur Detection | Check image sharpness |
| Crop Validation | Confirm correct framing |
| Resolution Verification | Ensure image quality |
| Country Rule Matching | Apply country-specific passport requirements |
| AI Compliance Review | Detect common rejection risks |
| Human Expert Review | Final quality inspection |
Unlike ordinary photo editors, PhotoOmni focuses on passport compliance rather than photo enhancement.
The goal isn't to make you look better—it's to help produce an image that accurately represents your appearance while meeting government requirements.
15 Common Mistakes When Taking Passport Photos at Home
Even with a good camera, simple mistakes can lead to rejection.
The most common issues include:
- Using the selfie camera
- Standing too close to the wall
- Uneven lighting
- Strong shadows behind the head
- Using camera flash
- Portrait Mode enabled
- Beauty Mode enabled
- Looking away from the camera
- Smiling too much
- Hair covering the eyebrows or eyes
- Wearing glasses that create glare
- Cropping too tightly
- Using screenshots instead of the original image
- Uploading a compressed image from a messaging app
- Forgetting to review the photo before submission
Data Insight
Most passport photo rejections are caused by a combination of small technical issues rather than one major mistake. Reviewing background, lighting, composition, and image quality together provides the best chance of first-time acceptance.
Frequently Asked Questions
Can I really take a passport photo using my phone?
Yes.
Most modern smartphones easily exceed the image quality required for passport applications. Proper lighting, background, and composition are much more important than camera resolution.
Should I use the front or rear camera?
The rear camera is recommended.
It usually has a higher-quality sensor and a standard focal length that produces more natural facial proportions.
Can I use Portrait Mode?
No.
Portrait Mode creates artificial background blur and may incorrectly detect the edges of your hair, ears, or shoulders.
Should HDR be turned on?
HDR can be helpful if it produces natural-looking skin tones without over-processing the image.
If HDR introduces halos, excessive sharpening, or unrealistic colors, it's better to disable it.
Can I use Beauty Mode?
No.
Beauty Mode, skin smoothing, face slimming, and AI facial enhancement may alter biometric features and should always be turned off.
Can I wear glasses?
If possible, remove them.
Even clear lenses may create reflections that obscure your eyes.
How far should the camera be from me?
A distance of approximately 1.2–1.5 meters (4–5 feet) usually provides natural facial proportions while leaving enough room for proper cropping.
How many photos should I take?
Take 5–10 photos and compare them before choosing the best one.
Do I need a professional camera?
No.
Most recent smartphones produce excellent passport photos when used correctly.
Can AI tell me whether my passport photo is acceptable?
AI can identify many common compliance issues—including background problems, incorrect head positioning, poor lighting, and image quality—but the final approval always belongs to the passport authority.
Final Thoughts
Taking a passport photo at home with a smartphone is simple when you follow the official passport photo guidelines. The most important factors are proper lighting, a plain background, correct framing, a natural facial expression, and a high-quality image. Meeting your country's passport photo requirements helps prevent delays or rejection of your passport application.
For extra confidence, PhotoOmni can automatically check your passport photo against country-specific standards and identify common issues before you submit. Spending a few minutes reviewing your photo can save time, reduce costs, and improve the chances that your passport application is accepted on the first submission.
About the Author
Emma Richardson Senior ICAO Photo Compliance Expert, PhotoOmni
Emma Richardson is the Senior ICAO Photo Compliance Expert at PhotoOmni. With 12+ years of experience, she has helped applicants achieve 820,000+ successful passport and visa photo approvals across 100+ countries and territories. She specializes in global passport photo requirements and ICAO-compliant photo verification.
About the Author
Emma Richardson is the Senior ICAO Photo Compliance Expert at PhotoOmni. With 12+ years of experience, she has helped applicants achieve 820,000+ successful passport and visa photo approvals across 100+ countries and territories. She specializes in global passport photo requirements and ICAO-compliant photo verification.
Related Articles
- Passport Photo Requirements Guide 2026
- Why Was My Passport Photo Rejected? 15 Common Reasons & Fixes
- Why Was My Passport Photo Rejected? 15 Common Reasons & Fixes
Printing in Singapore
Once your file is ready, use the Singapore passport photo printing and 4R guide to compare local options and avoid printer scaling errors.
Official Sources
- U.S. Department of State: Passport Photos
- U.S. Department of State: Uploading a Digital Photo
- U.S. Department of State: Photo Examples
These sources govern U.S. applications. Other countries may use different dimensions, background colors and digital-upload rules.