
CVS Passport Photo Print Template: How to Print a 4×6 Sheet at CVS (2026)
Prepare a 4×6 sheet of 2×2 passport photos for CVS. Compare layouts, review order settings, and measure and cut the finished prints correctly.
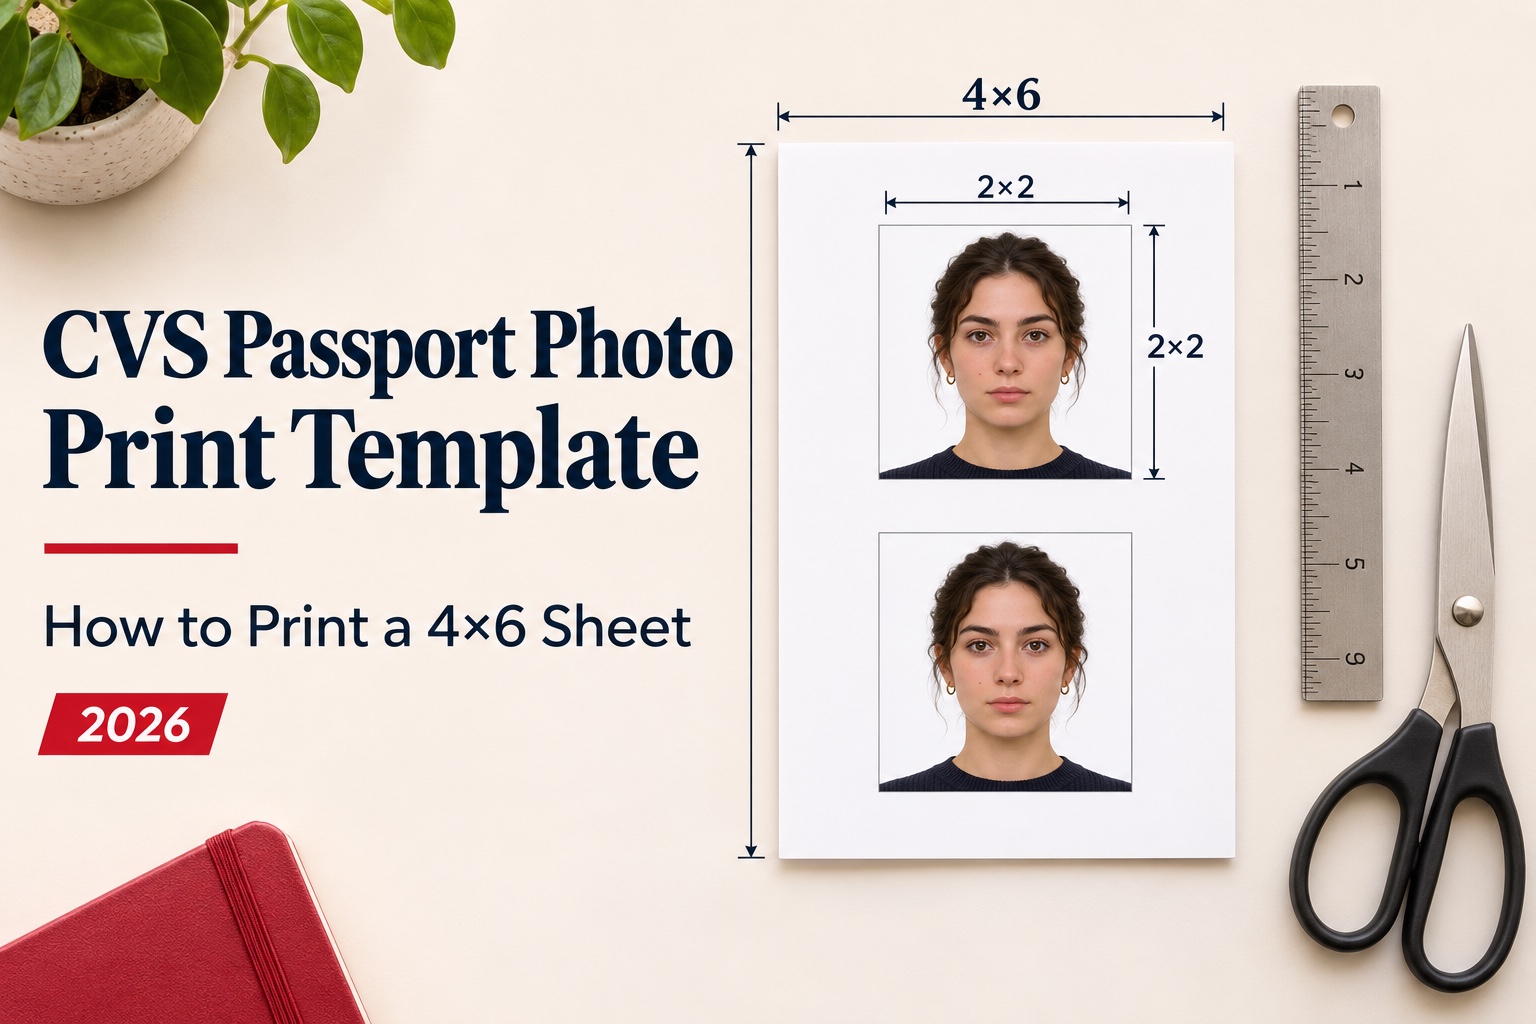
Quick answer: You can prepare US passport photos on a 4×6 sheet and order it as a standard print at a participating CVS Photo location. This is separate from the staffed passport photo service; confirm that your selected store can fulfill the print order. Create a compliant 2×2 inch digital photo, place it on a 4×6 inch template, upload the template to CVS Photo as an ordinary 4×6 print, collect it when your store confirms it is ready, and cut the photos out. A standard small print can cost less than a dollar before tax, depending on quantity, fulfillment and promotions; check the current cart total. The part that goes wrong is not the CVS order. It is the template layout, the print settings, and the cutting.
This guide puts the whole process in one place: what CVS offers, how many photos fit on a 4×6 sheet and why templates differ, the exact order settings, and how to check the finished prints before you submit them.
Two ways to get passport photos at CVS
| CVS passport photo service | Your own photo on a 4×6 print | |
|---|---|---|
| What you get | A CVS employee takes the photo and prints two | A standard photo print of a template you prepared |
| Typical price | Roughly $17 to $18 for two photos; varies by store | Standard-print pricing; CVS advertises photo prints from $0.32, but that starting price is not a guaranteed single-print pickup price. Check the 4×6 cart total |
| Photos on the sheet | 2 | 2, 4 or 6, depending on your template |
| Who checks the photo | The staffed service includes photo preparation; the issuing authority decides acceptance | You must check the source photo and finished print; a standard-print order is not a passport compliance review |
| Availability | Not every store offers it; confirm before you go | Participating locations and eligible products; confirm pickup availability |
The "who checks the photo" row matters most. Do not treat a plain-print order as a passport-photo verification service. The compliance of the photo is entirely your responsibility, so check the photo before you build the template.
When do you actually need a printed photo?
Printing is only needed for some applications:
- Passport by mail or in person (DS-11, DS-82 by mail): you submit a printed 2×2 inch photo.
- Online passport renewal: you upload a digital photo. No print is needed.
- DS-160 visa application: you upload a digital photo. Some interviews may ask for a print, so check your appointment instructions.
If your application only asks for a digital upload, skip the print order and use your digital file directly.
How many photos fit on a 4×6 sheet? Why templates disagree
You will see 2-photo, 4-photo and 6-photo templates online, and they are all "correct". They are different trade-offs.
A 4×6 inch print in portrait orientation is 4 inches wide and 6 inches tall. A US passport photo is 2×2 inches.
| Layout | Photos | What it means in practice |
|---|---|---|
| 2-up | 2 | Can leave white margin on every side when the two squares are centered in a vertical stack; still measure the result |
| 4-up (2 across × 2 down) | 4 | Uses a 4×4 inch block and leaves a total of 2 inches of vertical space. Two 2-inch photos span the full 4-inch width: no horizontal gap or side margin is possible |
| 6-up (2 across × 3 down) | 6 | Mathematically fills the whole sheet: 4×6 with zero margin. Any automatic crop or slight scaling eats into the outer photos, and there is no room for cut lines |
For easier trimming, use a 2-up layout: place two 600×600-pixel photos in a vertical stack on a 1200×1800-pixel canvas, with white margins around them. A 4-up layout has no side margin, and a 6-up layout has no outer margin at all. Never shrink the squares to make room for gaps or cut guides.
Whichever layout you use, the rule is the same: each photo must measure exactly 2×2 inches after printing. If the template is shrunk even slightly to fit, every photo comes out too small and can be rejected.
Step by step: print the template at CVS
Before you order
- Make sure the photo itself is compliant. The State Department requires a color photo, 2×2 inches, with the head measuring between 1 and 1⅜ inches from the bottom of the chin to the top of the head, plain white or off-white background, no glasses, and taken within the last 6 months.
- Build the template at 4×6 inches (1200×1800 pixels at 300 DPI is the usual size). Keep the individual photos at their original proportions. Do not stretch or resize them to fill space.
- Save as a high-quality JPG. Use another format only if the current CVS upload screen supports it. Avoid heavy compression. Cropping for size is different from retouching: preserve the original appearance and do not use filters, skin smoothing, background replacement or AI-generated facial edits. Retake a photo with poor lighting or an unsuitable background.
Place the order (website or app)
- Open CVS Photo prints in your browser, or use a CVS app photo-ordering option if available.
- Select the 4×6 standard print size.
- Upload the template file.
- On the preview screen, check that the whole template is visible. If a fit/crop control is offered, keep the complete 2:3 canvas without changing its proportions. Labels vary; do not assume a button called “fit” preserves the physical size of each square. If the preview clips any photo or the settings are unclear, stop and ask the photo counter before ordering.
- Turn off automatic enhancement or auto-correct if the order flow offers it. You do not want brightness, color or red-eye adjustments applied to a photo that must not be digitally altered.
- Use glossy or matte photo-quality paper. Both meet the US passport paper requirement, but the finishes offered depend on the product and fulfillment method. Do not assume matte is available for same-day 4×6 pickup.
- Select a participating pickup store and review its estimated readiness time. CVS advertises same-day service for select products and orders received by 7 PM local time; availability and completion depend on the order and store. Wait for the ready-for-pickup notification before traveling.
Or use an in-store kiosk
Ask the store which phone connection or storage media its kiosk supports. Choose a 4×6 print and decline auto-crop, auto-enhance and red-eye correction if offered. Check the kiosk preview before you pay.
Check the print before you cut
Do this at the store counter, before you leave:
- Size: Measure one photo with a ruler. It should be 2 inches wide and 2 inches tall.
- Head size: From the bottom of the chin to the top of the head, it should be 1 to 1⅜ inches.
- Sharpness: The photo should be sharp, with no visible pixels or printer dots.
- Paper: It must be glossy or matte photo paper. Photocopies and scanned prints are not accepted.
- Damage: No creases, smudges or holes.
If the photos measure slightly under 2 inches, the template was scaled during ordering. Fix the order settings and reprint rather than trying to submit them.
Cutting tips
- Cut along the template's guides with a paper trimmer or sharp scissors and a ruler. Place any cut marks outside the final photo boundaries. Cut on the measured 2×2-inch boundaries, without leaving guide marks or a neighboring image on the finished photo. Do not trim inside the boundary to remove a line.
- Re-measure after cutting. The final photo must still be 2×2 inches.
- Do not staple through the face area. For where to attach the photo to the application, follow the instructions on your form.
Common mistakes
- Using the template at the wrong scale. "Fit to page" in a home printer dialog or a kiosk can shrink everything. Always print at 100% or actual size.
- Letting the app auto-crop the edges. On a 6-up layout, this cuts into the outer photos.
- Ordering a different size. A 5×7 or 4×4 print changes the layout math and breaks the template.
- Skipping the photo check. Do not rely on a standard print order to identify passport compliance problems.
- Waiting too long. The photo must be recent, taken within the last 6 months, so do not print a photo from an old shoot.
Make the template with PhotoOmni
The CVS order is the easy part. The step most people struggle with is producing a photo that is actually compliant and a template that prints at exactly the right size.
Use PhotoOmni’s US passport photo tool to prepare and review your photo before printing. Select an output that matches your application, and confirm that any print sheet you download is exactly 4×6 inches with 2×2-inch photos. For US applications, preserve the original appearance and follow the State Department’s restrictions on digital edits. A photo review cannot guarantee acceptance or prevent a store printer from changing the scale.
FAQ
Does CVS take passport photos? Many stores do, for roughly $17 to $18 for two photos, but availability varies by location. Confirm with your store first.
Can I print passport photos at CVS from my phone? Use the CVS Photo website from your phone, or an app ordering option if available. Upload the sheet as a standard 4×6 print, review the preview and pickup estimate, and wait for confirmation.
What size should the template be? 4×6 inches, with each photo exactly 2×2 inches. The template should not be scaled during printing.
How many passport photos fit on a 4×6 print? Up to six fit mathematically, with zero margin. Four leave vertical space but no side margins. A centered two-photo vertical layout can leave margins on all sides without shrinking either square.
Glossy or matte? Either is accepted. Both must be photo-quality paper.
Can I use the same template for a visa photo? For US visas the photo size is also 2×2 inches, but always check the specific instructions for your application. Other countries use different sizes.
What if my prints come out too small? The template was probably shrunk during ordering. Review the preview and crop settings, confirm the canvas is 4×6, and ask the store how to preserve the layout. Do not enlarge an already cropped face to compensate. Reprint and measure again.
Bottom line
Printing at CVS is a cheap and fast way to get passport photos if you prepare the template correctly. Build a 4×6 template with exact 2×2 inch photos, order a plain 4×6 print with the complete layout preserved and enhancement disabled where offered, measure before you leave the store, and cut carefully. Prepare the source photo first, then check the printed dimensions; the template alone does not establish compliance.
Sources
Prices and service information checked November 11, 2026; confirm the current checkout and selected store.
- CVS Photo: standard prints and current starting prices
- CVS Photo: staffed passport photo service
- CVS Photo: same-day pickup conditions
- US Department of State: passport photo requirements
Related guides
- CVS passport photo price and service options
- 4×6 passport photo layouts and print settings
- Where to print your own passport photo file
About the Author
Emma Richardson is PhotoOmni’s Senior ICAO Photo Compliance Expert. With over 12 years of experience, she has helped applicants obtain more than 820,000 passport and visa photo approvals across over 100 countries and territories. She specializes in global passport photo requirements and ICAO-compliant photo verification.